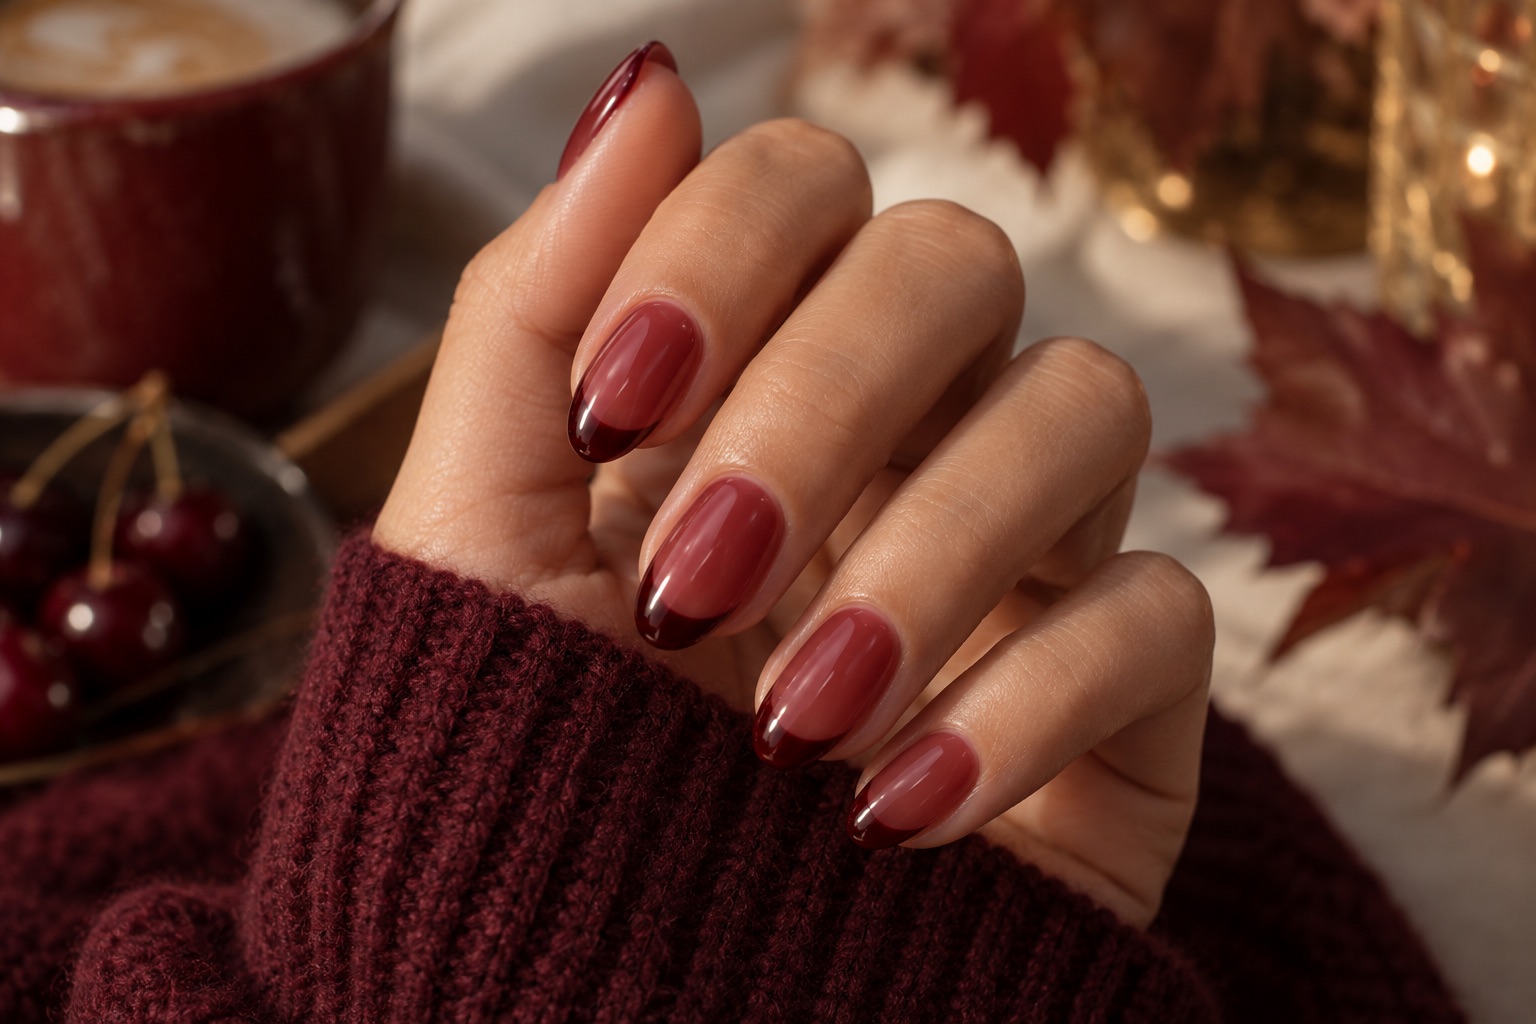
Jelly French nails pair a translucent wash of colour with a more defined tip. A cherry-red base and burgundy edge give you the shape of a French manicure without the sharp contrast of pink and white. The nail remains visible through the colour, so the finish looks lighter than a fully opaque red manicure.
The choice of polish makes a difference. Jelly formulas are designed to be sheer and buildable, and some can be layered over conventional coloured polish.[1] For this version, use a sheer cherry polish over a darker French tip to soften the transition between the two colours.
Choose the right jelly polish
Look for a polish described as sheer, translucent or jelly. A bottle of glossy red lacquer will not necessarily give the same result: shine and transparency are different properties. A top coat can make an opaque colour glossy, but it cannot make it see-through.
Choose a burgundy tip colour that looks noticeably deeper than your cherry base. Using shades from the same colour family is an easy starting point. If the contrast is too subtle, the tip may disappear when you cover it with another layer of jelly polish.
Test the combination on a swatch before painting your nails. Apply the jelly colour, add a burgundy stripe, then cover both with a thin jelly layer. Check whether the stripe is still visible and whether you like the resulting shade. This is more useful than judging the colours through their bottles.
Jelly describes the finish, not the curing method. You can create this manicure with conventional air-drying polish. If a product is labelled UV or LED gel, it needs its specified curing system; it is not a substitute in the air-drying method below.
What you need
- A base coat for conventional nail polish.
- A sheer cherry-red jelly polish suitable for layering.
- An opaque burgundy polish.
- A fine nail-art brush.
- A compatible glossy top coat.
- A nail file, polish remover and lint-free pads.
A fine brush gives you more control over the tip than a wide bottle brush. There is no need to buy several nail-art tools for this design.
How to paint cherry jelly French nails
Prepare the nail surface
Remove old polish and file your nails into your preferred shape. Clean away product residue before applying a thin base coat. Essie recommends cleansing the nails before a French manicure because leftover oils can contribute to chipping.[2]
Keep the skin around your nails intact. The American Academy of Dermatology advises against cutting or forcefully pushing back cuticles because this can lead to infection.[3]
Apply a sheer layer of cherry colour
Paint a thin coat over the whole nail, keeping the polish off your skin. Aim for an even tint rather than complete coverage. Your natural nail tip may still show through; that is part of the look.
Allow the coat to dry as directed by the manufacturer before adding the French detail. Do not keep brushing over a layer that has begun to set in an attempt to make it opaque.
Draw the burgundy tip
Rest your hands on a table and use the fine brush to draw a curved line along the end of the nail. Start narrow. You can widen the line if needed, but correcting an oversized tip is harder.
Follow the shape of the nail rather than forcing a deep curve onto every finger. Compare neighbouring nails as you work. The tips should look balanced across the hand, even if their widths are not identical.
Soften the tip with another jelly layer
Let the burgundy detail dry before covering the entire nail with another thin coat of cherry jelly. Use a light touch and avoid repeatedly dragging the brush across the tip.
This additional layer is a design choice: it gives the base and tip a shared tint. If you prefer a sharper contrast, leave it out and finish the colour with your top coat instead. Choose a jelly polish whose manufacturer permits layering over other nail colours.[1]
Add a glossy top coat
Apply the top coat according to its instructions. Essie’s French manicure guidance recommends a glossy finish, which also suits the translucent colour in this design.[2]
Allow enough drying time before using your hands. Follow the products’ directions rather than relying on a universal waiting time; different formulas and layer thicknesses behave differently.
Keep the tip fine on short nails
You do not need extensions for a French manicure. Essie describes both short-nail French styles and the micro French, which uses a very fine line of colour at the tip.[2]
For a short cherry jelly manicure, try that narrower line and leave most of the nail translucent. A broad burgundy band creates a much heavier result. Check the little finger in particular: a stripe that looks delicate on the thumb can overwhelm a smaller nail.
Colour combinations beyond cherry
The same approach works with other colour families. These are suggested pairings to test on a swatch, rather than fixed recipes.
| Sheer colour | Opaque tip | Look to aim for |
|---|---|---|
| Cherry red | Burgundy | A deeper edge within a red palette |
| Rosy pink | Raspberry | A softer pink manicure with a defined tip |
| Sheer purple | Plum | A cool-toned alternative to red |
| Amber brown | Chocolate brown | A warm, understated combination |
What to change if the finish looks wrong
The tip disappears
The jelly layer may be too thick or too opaque for the contrast you have chosen. Test a thinner coat or a darker tip colour. Adding more layers over the same nail is unlikely to bring back a detail that is already hidden.
The burgundy smears into the base
Give the tip more time to dry and use fewer brush strokes when applying the next layer. If a nail has become badly smeared, removing its polish and starting again is often simpler than trying to redraw the tip through several coats.
The colour looks patchy
Check whether polish has collected more heavily at the sides or near the cuticle. On your next attempt, use less product and spread it evenly. A sheer tint does not need to hide the natural nail, but it should not have a thick dark border around a pale centre.
Keep the manicure comfortable to wear
A clean finish depends on careful brushwork, not aggressive cuticle removal. Once the manicure has dried, moisturise the surrounding skin. After removing the polish, moisturise your nails as well; the American Academy of Dermatology notes that polish removers can dry them out.[3]
If you are booking a salon appointment, ask for a sheer cherry base, a fine burgundy French tip and a glossy finish. Mention whether you want the tip softened with another translucent layer, and confirm whether the service uses conventional polish or a lamp-cured system.